
Recipe in Finnish / Resepti suomeksi
Sauerkraut is something you either love or hate. I love it and I would like to encourage you to try it too, but make it yourself. If you haven’t done any fermentation projects before this is the place to start. It is not at all difficult and you only need a head of cabbage, salt and a glass jar!
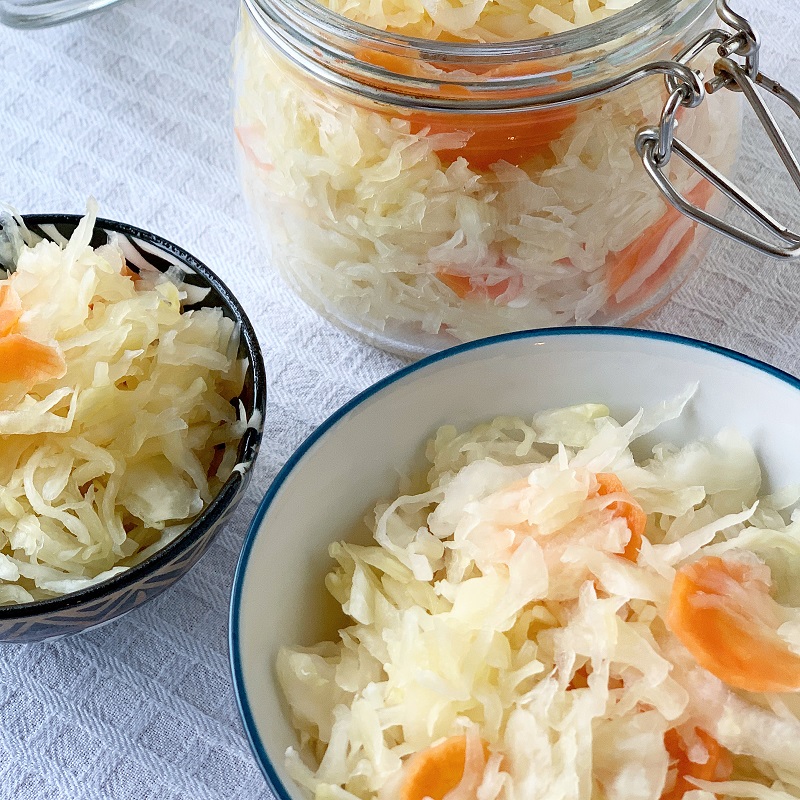
I have made my own sauerkraut for years. It is a simple process and it is difficult to go wrong. Shredded cabbage in its own salty brine will transform into something incredibly tasty and healthy through a fermentation process. This process will take 3-10 days depending on your taste and surrounding temperature. Homemade sauerkraut is full of healthy probiotics and other immune-boosting nutrients that have numerous positive effects on our gut and health in general.
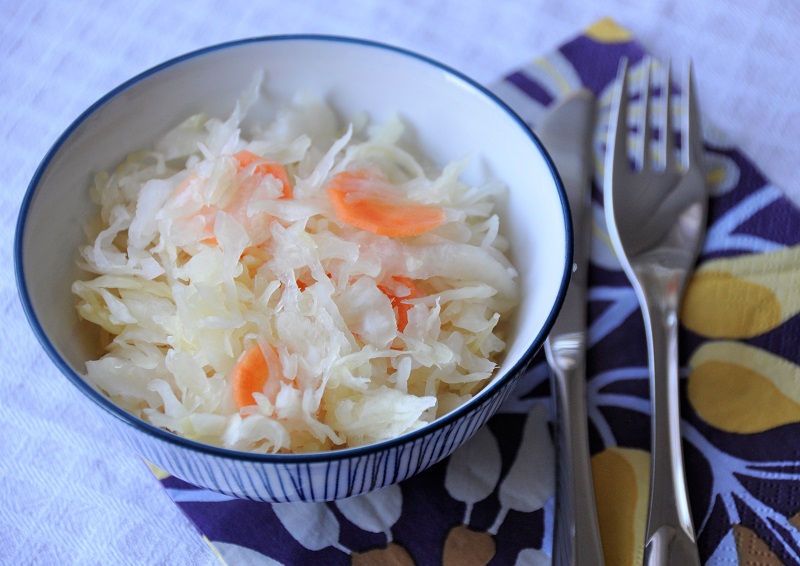
I eat sauerkraut almost every day, so it makes even more sense to make it at home. I also prefer my home made sauerkraut to the store-bought ones, which are often too soft and soggy to my liking. With your own, you get a nice crunch!
If you want to add little colour to your sauerkraut add some carrot too. I always do!
Ingredients
Method
- For the fermentation process to be successful make sure everything is clean. Sterilize your cutting board, knife, peeler and jar with boiling water. Give your hands a good wash too.
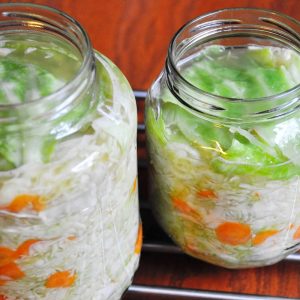
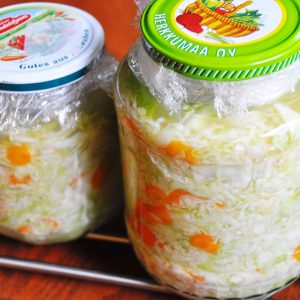
- Get rid of the wilted outer leaves of the cabbage and remove a few clean outer leaves and set them aside for later use. Split the cabbage and shred it thinly. You can use a sharp knife, food processor that does shredding or use a cheese slicer like I do.
- Peel the carrots and slice them into very thin discs. Use whatever tool works best for you. I use my veggie peeler.
- Place the cabbage and carrots into a large bowl. Sprinkle with salt and mix well so that the salt spreads all over the cabbage.

- You can leave the cabbage to sit for a little while and let the salt start doing its work. The cabbage will soften slightly and the liquids begin to drain out OR you can begin to massage and squeeze the cabbage with your hands straight away. Keep doing this until cabbage is soft and watery. This will take little work and patience, 10-15 minutes.
- Pack the cabbage into the sterilized jar. Once in a while use your fist or spoon to push the cabbage in tightly. The cabbage should be submerged in its liquid completely. Use any remaining liquid in the bowl and pour over cabbage in the jar. Then cover the cabbage with the cabbage leaves that you set aside earlier. Make sure all of the shredded cabbage is the liquid.
- Then you need something to weigh the cabbage down and keep it under the liquid surface. I have used a smaller glass jar or a water weight. The water weight (see instructions below) is easy to make from a freezer bag and water, but a glass jar will do just as fine. Just make sure it is sterilized! Water weight: Fill a freezer bag with enough water so it fits between the cabbage and the closed lid. Close the freezer bag with a tight knot. Do not use a rubber band for hygienic reasons.
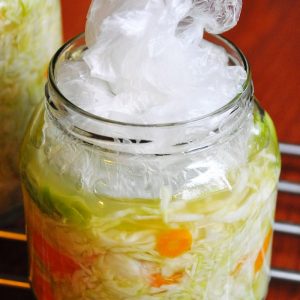
- After you have your weight on top of the cabbage, close the glass jar lid carefully, but not too tightly. Fermentation gases should be able to escape from the jar.
- Place the glass jar in a bowl or plate (liquid may bubble out) and place the jar somewhere dark in room temperature. I ferment mine in a cupboard with my pots. Leave the cabbage to ferment for at least 3-5 days. The longer the cabbage ferments, the stronger the taste becomes. You can open the jar after 3 days, smell and taste how the fermentation is developing. The smell is normally quite intense, but it should always be fresh. You may see some bubbles coming through the cabbage or foam on top but it is all a sign of a healthy fermentation process. You can just remove the foam with a clean spoon.
- Once the cabbage has fermented enough for your taste, place the jar in the refrigerator and store it there. Sauerkraut can be stored in the refrigerator for several months.
Sauerkraut goes with everything! Add it to your salads or side of your plate whatever you are having.
Leave a Reply